A wishlist group collects everyone's wishlists in one place, so the whole group can see what each person would love and quietly claim gifts. It works for a family, a group of friends, or a party. You set it up once, then invite people with a link.
Steps
- Tap the + button in the middle of the bottom bar, on any screen.
- Tap Wishlist group. (No groups yet? On the Wishlists tab you can also tap Create your first group.)
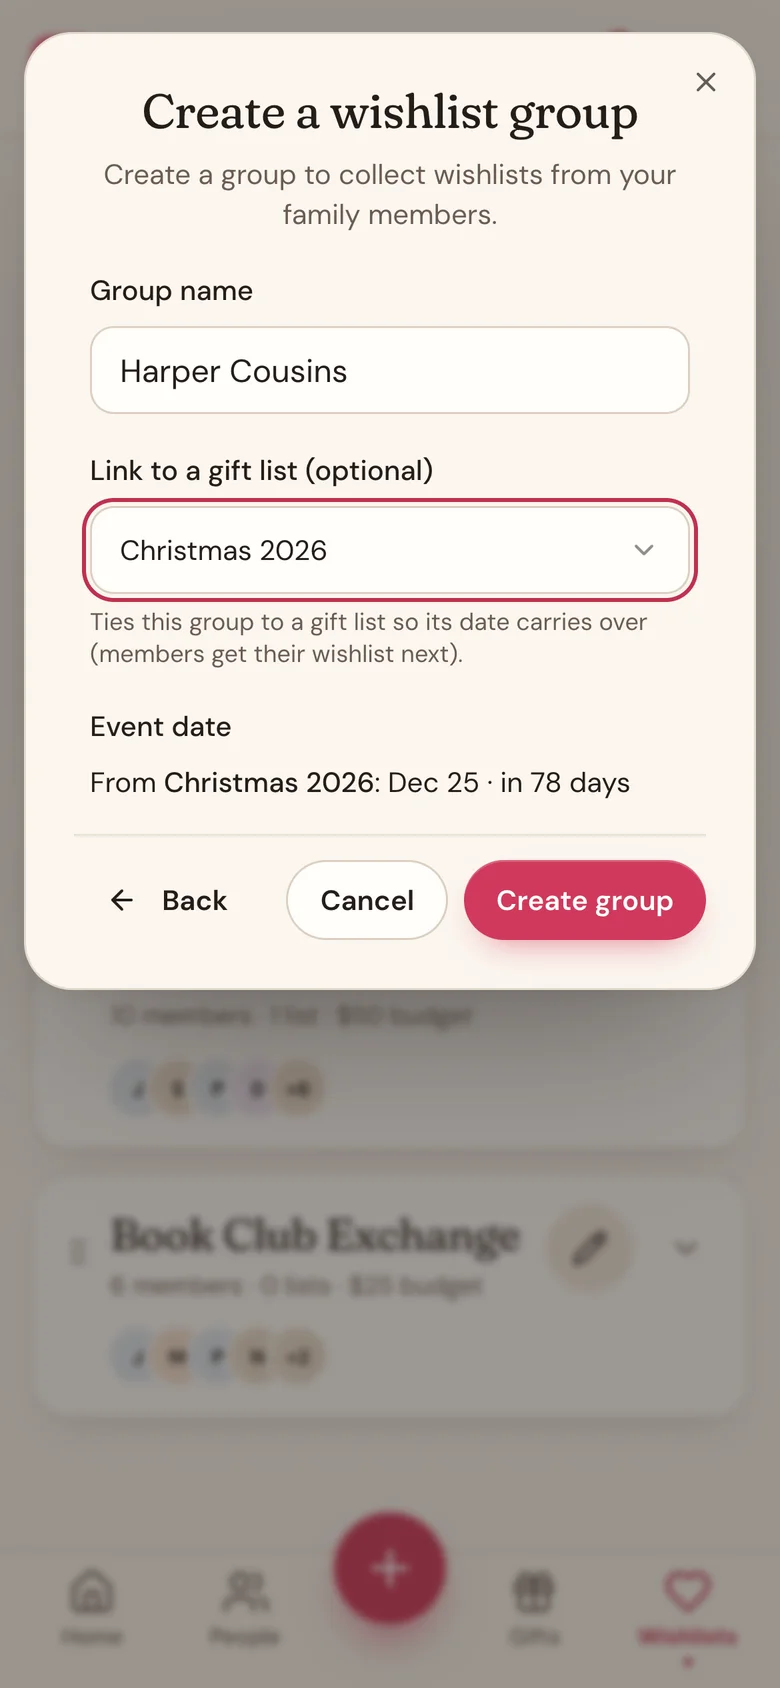
- Type a Group name, like "Smith Family Christmas".
- Optional: under Link to a gift list (optional), pick one of your gift lists. The group takes its date from that list, and everyone you add gets a spot on the list plus a wishlist in the group. Not linking? Pick an Exchange / event date (optional) instead, so everyone sees a countdown.
- Tap Create group.
Add yourself
Creating a group makes you its organizer, but not one of its members. To have your own wishlist in the group, add yourself:
- Open the group's card on the Wishlists tab and tap Add a member.
- Under Who is this?, choose Me (this account).
- Tap Add member & wishlist.
Your wishlist in the group also shows under Yours at the top of the Wishlists tab.
Good to know
- Only the organizer can add, edit, or remove members, and edit or delete the group.
- You can change the name, the linked gift list, or the date later. Tap the pencil icon on the group's card.
- Linking a gift list is what connects the group to your planning: each member becomes a person on that list, so their wishes are right there when you shop for them.
- Want to draw names for a gift exchange instead? Make a Secret Santa group.
Related
Still stuck?
Ask Wishpile and get an answer in seconds, or email support@wishpile.com and a real person will get back to you. Quick answers live in the FAQ.